Chat

Showing posts with label Animated. Show all posts

Friday, August 28, 2026

Fall - FTU

Scrap kit - DC's "Falling Leaves" - HERE

Mask - Your choice

Template - HPD - HERE (#3)

Tube - Pinuptoons

AnimationHERE (mine is a PTU)

***Disclaimer***

This tutorial is of my own creation. I am using PSP2019. Please leave a thanks when downloading.  If I am using a template, I always start at the bottom and work my way up. If using a FTU or PTU tube - please don't use without proper copyright. Always drop shadow as you go. If you try one of my tuts, I would love to display it on my blog....thanks

~~~~~~~~~~~~~~~~~~~~~~~~

Open template and delete copyright layer and layer 5

Image/canvas size/800x800

Background - flood fill white if you animate

P5 (resize 80%) - apply mask/merge group

E45 - re4size 80%

Layers 1&2 - flood fill

Layers 3&4 - flood fill

Layer6 - E92

Frame2 - resize 70%

Layers 7-10, 12, & 14 - flood fill

3 white squares - p4

E40 - resize 40%

E18

Effects/edge effects/enhance

E2

Effects/edge effects/enhance

E80 - resize 60%

E19 - resize 35%

E44 - erase frame - resize 50%

E24 - resize 40%

E38 - resize 35%

Position tube

Merge visible/crop/resize as needed/add proper copyright 

If you want to animate - close all element layers

Merge visible the template layers

Open AS

Open animation you want and select all (notice how many frames your ani has)

Copy the merge visible and paste into AS as new animation

Ctrl+L to add frames needed (mine was 17)

Ctrl+A to select all

Drag animation and position

Back in psp....close out merge layer and open elements/tube

Merge visible

Copy and in AS paste as new animation

Ctrl+L to add frames needed 

Ctrl+A to select all

Drag this to your animated image

View animation...if happy, save


Tuesday, June 23, 2026

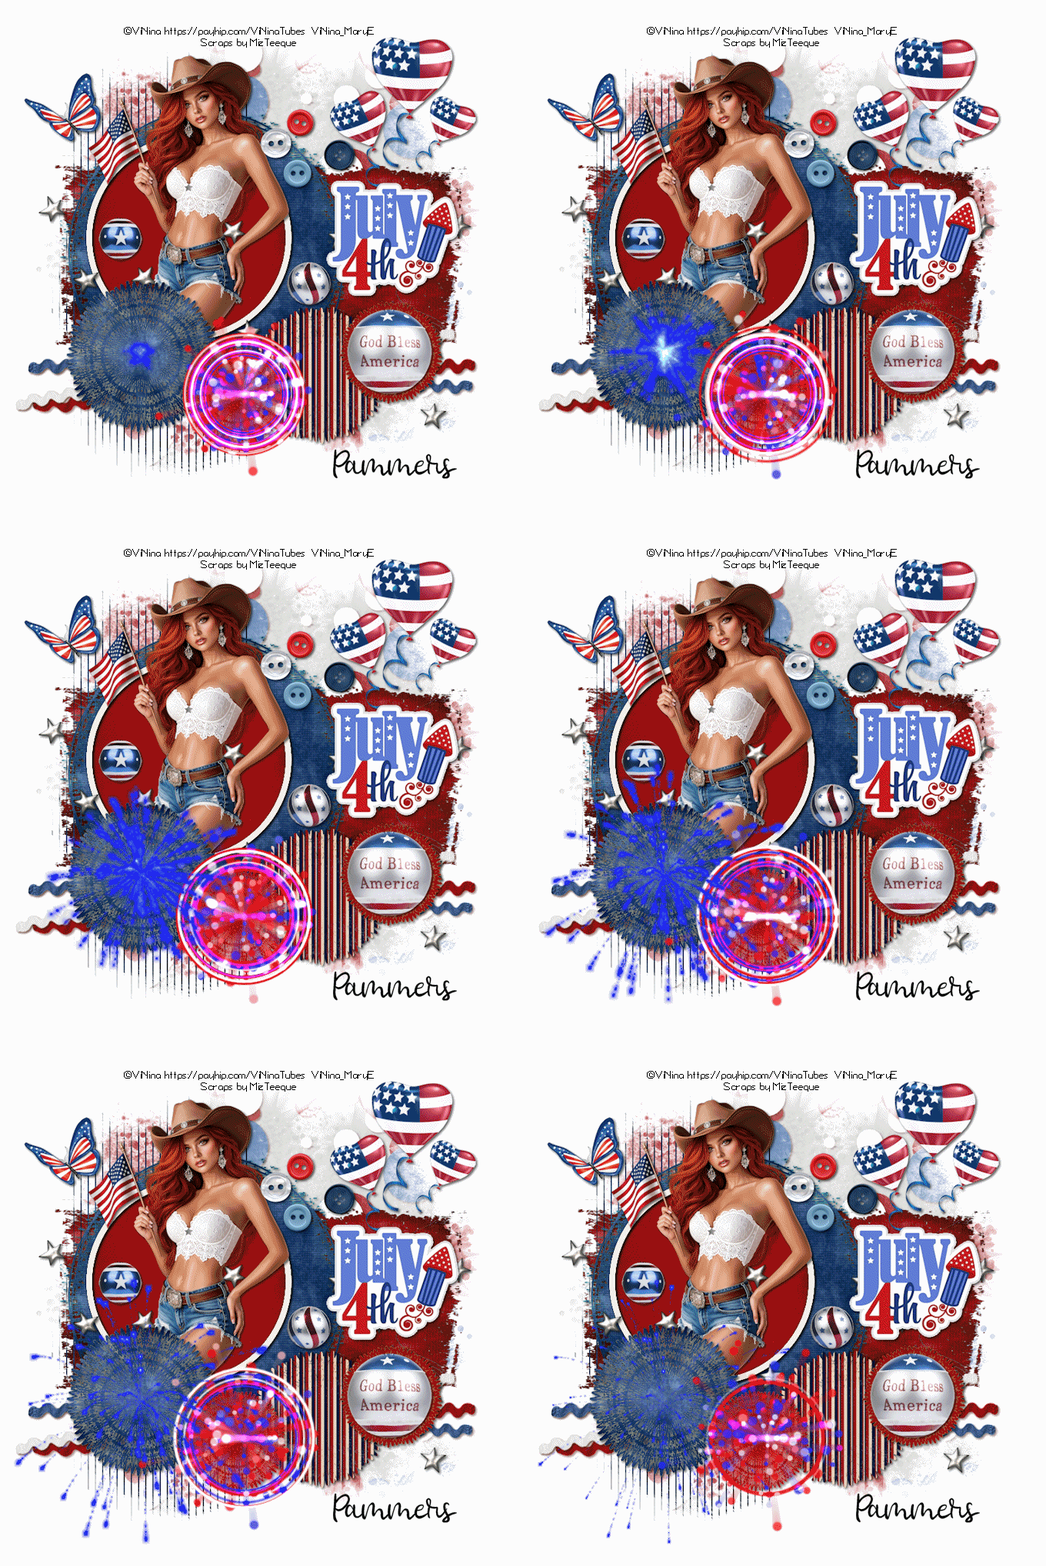
Sparkle 4th - FTU

Scrap kit - DC's 4th of July - HERE

Mask - Your choice

Template - BKC's - HERE

Tube - Pinuptoons

***Disclaimer***

This tutorial is of my own creation. I am using PSP2019. Please leave a thanks when downloading.  If I am using a template, I always start at the bottom and work my way up. If using a FTU or PTU tube - please don't use without proper copyright. Always drop shadow as you go. If you try one of my tuts, I would love to display it on my blog....thanks

~~~~~~~~~~~~~~~~~~~~~~~~

Open template and delete copyright layer

Image/canvas size/800x800

Flood fill bottom layer if animating

P11 - apply mask/merge group

Black layers - flood fill 

Middle pink - p4

Left & right pink - p20

E100

E99

Left & right pink circle - p9

E45 - resize 50

E46 - resize 40%

E47 - resize 30%

Merge these 3 together and duplicate 2x

Alien xenofex/constellation/5,25,15,15,100,50 angle 45/keep original image

Hide layer/click next layer/constellation/hit random seed and repeat for last layer

E16 - resize 45%

E22 - resize 50%

Position tube

E102 - resize 30%

E81

E35 - resize 35%

Image/free rotate/left by 20 and add gradient glow

E86 - resize 90%

E24 - resize 35%

E103 - resize 35%

E94 - resize 35%

E92 - resize 30%

E13 - resize 40%

E14 - resize 30%

E101 - resize 35%

If you are not animating

Merge visible/crop/resize as needed/add proper copyright 

If animating, add your copyright

Open AS

PSP - copy merged

AS - paste as new animation

PSP - x out that layer/open the next one

PSP - copy merged

AS - paste after current frame

PSP - x out that layer/open the next one

PSP - copy merged

AS - paste after current frame

View animation

Save

Pauline


Monday, June 1, 2026

Stars&Stripes - FTU

 Scrap kit - Stars & Stripes - HERE

Mask - Your choice

TemplateHERE

Tube - Prihodko - HERE

AnimationHERE

***Disclaimer***

This tutorial is of my own creation. I am using PSP2019. Please leave a thanks when downloading.  If I am using a template, I always start at the bottom and work my way up. If using a FTU or PTU tube - please don't use without proper copyright. Always drop shadow as you go. If you try one of my tuts, I would love to display it on my blog....thanks

~~~~~~~~~~~~~~~~~~~~~~~~

Open template and delete copyright layer 

Image/canvas size/800x800

Flood fill white layer

P6 - apply mask/merge group

Rectangle - p9

Stripes - p8

Bg circle - p8

Frame fill - p4

Position tube

Round images - new raster layer/flood fill/hide original layer

E17 - resize 50%

E46

E18 - resize 40%

E44

E66 - resize 30%

E24 - resize 40%

E23 - resize 20%

E25 - resize 20%

E45 - resize 30%

Merge visible/crop/resize as needed/add proper copyright

TO ANIMATE:

Open AS

Open MNG #473

CtrlA to select all

Copy image from PSP

Paste as new animation

CtrlL 15 times (total of 16)

CtrlA to select all

Drag your animation into position on PSP image

Save

Mary


Monday, May 25, 2026

American Girl - FTU (Animated)

Scrap kit - American Girl by Simone - HERE

Template - #57 - HERE (bundle 51-60)

Tube - A. Prihodko - HERE

Animation by me - HERE or HERE

***Disclaimer***

This tutorial is of my own creation. I am using PSP2019. Please leave a thanks when downloading.  If I am using a template, I always start at the bottom and work my way up. If using a FTU or PTU tube - please don't use without proper copyright. Always drop shadow as you go. If you try one of my tuts, I would love to display it on my blog....thanks

~~~~~~~~~~~~~~~~~~~~~~~~

Open template and delete copyright layer and flood fill bottom with white if animating

Image/canvas size/800x800

E70 - resize 120%

Dot set 2 - p4

Large dark circle - flood fill

Add noise of choice

Large light circle - flood fill

Texture of choice

Dot set 1 - flood fill

Dark rectangle - flood fill

Add noise

Light rectangle - flood fill

E29 - resize 60%

Small dark circle - flood fill

Add noise

small light circle - flood fill

Position tube

E34

E24 - resize 70%

E5 - resize 50%

Duplicate/mirror

E4 - resize 30%

E10 - erase string - resize 30% 

E13 - resize 45%

E30 - resize 35%

If you are not going to use animation....you are done

Merge visible/crop/resize as needed/add proper copyright

Open Animation Shop

PSP - copy

AS - paste as new layer

Ctrl L 2 times

Ctrl A once to select all

Open mng - CtrlA to select all

Animation tab/resize animation/percentage of original/width 150

Click U and drag into position

Check animation

If you want it slower (I slowed mine down)

Animation tab/frame properties/120

Save

Anne


Saturday, February 21, 2026

Irish Pride - FTU - Animated

Scrap kit - Irish Pride - HERE (scroll down to find this kit)

Mask - Your choice

Template - #25 - HERE (21-30)

Tube - Alicia Mujica - HERE

AnimationHERE (2nd one)

***Disclaimer***

This tutorial is of my own creation. I am using PSP2019. Please leave a thanks when downloading.  If I am using a template, I always start at the bottom and work my way up. If using a FTU or PTU tube - please don't use without proper copyright. Always drop shadow as you go. If you try one of my tuts, I would love to display it on my blog....thanks

~~~~~~~~~~~~~~~~~~~~~~~~

Open template and delete copyright layer and frame, 

Image/canvas size/800x800

P1 - apply mask/merge group/send to bottom

Background swirl - flood fill

Add inner bevel of choice

Stripe - p10

Splatter

Frame fill - p9

Frame trim - flood fill

Scatter - resize 95%

Shamrock star swirls - resize 85%

Candy - resize 50%

Flower3 - resize 35%

Bird - resize 45%

Swirls - resize 60%

Pot of gold - resize 45%

Position tube

Bow2 - resize 50%

Merge visible/crop/resize as needed/add proper copyright  

Animation:

Open AS

Open your animation/select all (set aside for now)

PSP - Merge visible

Paste into AS as new animation

Ctrl+l till you have 20 frames

Ctrl+a will select all

Drag your ani to were you want it to show (make sure you are on frame1)

View animation and if happy, save


Saturday, November 1, 2025

Christmas Cookie - No Scrap - FTU

Template - HPD - HERE

Mask - Your choice

Plug-ins - PSP Effects

Funhouse - HERE

Tramages - HERE

Animation by SimoneHERE (I used the first one)

Tube - CRM (from CDO) not sure where to get now)

***Disclaimer***

This tutorial is of my own creation. I am using PSP2019. Please leave a thanks when downloading.  If I am using a template, I always start at the bottom and work my way up. If using a FTU or PTU tube - please don't use without proper copyright. Always drop shadow as you go. If you try one of my tuts, I would love to display it on my blog....thanks 

~~~~~~~~~~~~~~~~~~~~~~~~~~~~~~~~~~~~~~~

Open template and delete copyright 

White layer - flood fill white (if you want to add an animation)

Add new raster layer

Make a gradient from 2 colors of your tube/radial/angle at 50/repeats 1 and flood fill

Effects - DSB Flux - weave/gap size 5, width 8, opacity 1/fill gaps checked

I used the colors from my gradient

Apply mask/merge group

Slats layer

Magic wand - add/rgb/60

Click on every other

Flood fill with gradient/select none

Click on the other 2 and flood fill

Funhouse - Xaggerate/default

Add inner bevel of choice

Gradient glow of choice

Merge 4 diamonds together - flood fill

Diamond - flood fill gradient changing it to linear (same settings)

Diamond 5 - flood fill

Tramages - tow the line/26, 20, 117, 70

If you want, use a brush of choice to decorate

If not animating, add tube with proper copyright

If animating,,open AS

Do not add tube yet

Add your copyright

Copy merged/paste as new ani in AS

Open your animation file

Select all

Go to your image/ctrl+L and hit for a total of 23 frames/select all

Drag your ani file onto you image and position

Open your tube in AS

Ctrl+L and hit for a total of 23 frames/select all

Drag your tube to the position you like

Check animation and you are done.

Friday, February 21, 2025

Irish Pride - FTU and Animated

Scrap kit - Irish Pride by Punky - HERE

Mask - Your choice

Template - #50 by Donna - HERE

Tube - Garvey

Animation by Simone HERE #282

***Disclaimer***

This tutorial is of my own creation. I am using PSP2019. Please leave a thanks when downloading.  If I am using a template, I always start at the bottom and work my way up. If using a FTU or PTU tube - please don't use without proper copyright. Always drop shadow as you go. If you try one of my tuts, I would love to display it on my blog....thanks

~~~~~~~~~~~~~~~~~~~~~~~~

****When attempting this template, I use my magic wand set to - Add/Perceptual/20 and click the white part of frame/promote selection to layer/select none****

Open template and delete copyright layer and flood fill background white

Image/canvas size/700x700

P1 - apply mask/merge group

Coin scatter - resize 90%

Raster4 - flood fill light green

Raster2 - p18

Promoted - flood fill/add inner bevel

Raster3 - p5

Promoted - flood fill/add inner bevel

Glitter1

Glitter2

Spiral

Bow7

Rose - resize 80%

Frame1

Lips - resize 60%

Clover coins

Position tube as you see fit

Merge visible/crop/resize as needed/add proper copyright 

AS - 

Copy image and paste as new animation

Open Simone ani/select all 

Back on image

Ctrl L for a total of 21 frames

Ctrl A to select all

Drag ani and place middle of lips

Adele

Rachey
Sandy
June
KITT


Thursday, January 30, 2025

Anything is Possible with Coffee - FTU

 Scrapkit - SYHOB - HERE

Mask - Supplied in kit

Template - by Penny - HERE

Tube - Anna Liwanag - currently unavailable

Animation - SBOF - HERE


(I wrote this tut last year sometime and totally forgot to post it...I made the word art and at this time can't figure where I saved it.)

***Disclaimer***

This tutorial is of my own creation. I am using PSP2019. Please leave a thanks when downloading.  If I am using a template, I always start at the bottom and work my way up. If using a FTU or PTU tube - please don't use without proper copyright. Always drop shadow as you go. If you try one of my tuts, I would love to display it on my blog....thanks

~~~~~~~~~~~~~~~~~~~~~~~~

Open template and delete copyright layer

Image/canvas size/800x800

E28 - resize 80%

E21

E23 - resize 80%

2 frames - flood fill dark brown

Add noise of choice

Narrow rectangle - p5

Rectangle - p3

E32

E17

E29

E31 - resize 70%

Position your tube

E18 - resize 25%

E1

Merge visible/crop/resize as needed/add proper copyright

Open AS if you want to animate

Open your animation in AS, edit/select all

Copy image from PSP and paste as new image in AS

Ctrl+L hit 24 times and Ctrl+A to select all (your image should have 25 frames)

Drag your animation and position over your coffee cup and release

View animation, if happy, save

Sunday, October 20, 2024

Spooky - FTU Animated

Scrap kit - DBS Spookalicious - HERE

Mask - Your choice

Tube - Laguna - HERE

***Disclaimer***

This tutorial is of my own creation. I am using PSP2019. Please leave a thanks when downloading.  If I am using a template, I always start at the bottom and work my way up. If using a FTU or PTU tube - please don't use without proper copyright. Always drop shadow as you go. If you try one of my tuts, I would love to display it on my blog....thanks

~~~~~~~~~~~~~~~~~~~~~~~~

P22 - apply mask/merge group

Frame4

Add heavy gradient glow on frame

Frame6 - image/rotate right/move below frame4

Cluster2

Click inside frame/on mask layer/promote selection to layer

Effects/texture/antique mosaic

Bubbles

Scatter

Ghost (duplicate to make a little darker)

Sparkle2

Sparkle3

Spider2 - resize 50%

Potion3 - resize 40%

Spellbook - resize 40%

Candle - resize 40%

Cauldron - resize 40%

Position tube

Merge visible/crop/resize as needed/add proper copyright 

If animating, continue

Click on your ani layer

Xenofex-constellation at 2,20,50,25,50,75,twinkle at 45/keep original image checked

Copy merged

In AS, paste as new animation

Back in PSP, undo

Constellation - hit random seed

Copy merged

In AS - click image and paste AFTER current frame

Back in PSP, undo

Constellation - hit random seed

Copy merged

In AS - click image and paste AFTER current frame

View animation, if happy, save

As always, would love to see what you create....thanks

Rosey

penny¢ (used different kit)


Thursday, March 7, 2024

Forum Style - No Scrap (Animated)

 Tube of choice. I used 2 tubes by Alicia Mujica -  HERE

Plug Ins - Mura Meister, Alien Skin Xenofex2, DSB Flux, and Xero

~~~~~~~~~~~~~~~~~~~~~~~~~~~~~~~~

New image/625x300

Paste image

Mura meister/copies/preset menu seamless

Adjust/sharpness/sharpen more

 Adjust/blur/motion/angle 25/strength 100

Do blur again

Adjust/sharpness/sharpen more

Duplicate

DSB Flux - Bubbles/5,20,20,20

Layer properties to Screen or what looks best for you

Click on original layer

Grab your selection tool/rounded rectangle

Draw across your image

Convert to layer/select none

Bring to top

On this new layer/add a small border

Drag down one layer and rename animation

I added a small green drop shadow to this layer

Click top layer

Grab your other tube and position as you like

Merge these tube layers together

Xero/porcelain/all sliders to left

Adjust/sharpness/sharpen more

Layer properties screen with opacity at 60

Place main tube

Add new layer and flood fill with color of choice

Select all/modify/contract by 4 or 6/hit delete/select none

Add inner bevel of choice

Add proper copyright and save

If animating, continue

Click on your ani layer

Xenofex-constellation at 5,20,50,25,50,75,twinkle at 45/keep original image checked

Copy merged

In AS, paste as new animation

Back in PSP, undo

Constellation - hit random seed

Copy merged

In AS - click image and paste AFTER current frame

Back in PSP, undo

Constellation - hit random seed

Copy merged

In AS - click image and paste AFTER current frame

View animation, if happy, save

As always, would love to see what you create....thanks


Friday, December 15, 2023

O Holy Night - No scrap

Plug ins used - Mura meister, Funhouse, VM Natural

Word art of choice

If you want to animate, I used an animation from Simone - HERE 

Tube - PUT - HERE

Instruction for animating are below this tut

~~~~~~~~~~~~~~~~~~~~~~~~~~~~~~~~~~~~~~~

600x300

Make a gradient with 2 colors from tube

Radial/Angle 90/repeats 1

Flood fill with gradient

Duplicate

Top layer - Adjust/blur/motion/angle 45/strength 100

Effects/reflection/rotating mirror Horizontal 10/angle 225/edge mode/wrap

Layer opacity at 40

VM Natural/sparkle/top #17

Bottom layer - Funhouse/xaggerate/24/87

Adjust/sharpen/sharpen more

VM Natural/sparkle/top #17

Grab you rectangle shape tool using you gradient....draw 3 thin rectangles and add a glass effect

Position your word art

New raster layer and flood fill with a dark color from tube

Add noise of choice

Selections all/modify/contract by 6/delete/select none

Add a glass effect 

Position your tube

Crop tag/add proper copyright/save

IF YOU ARE GOING TO ADD THE SNOW

Crop tag/add proper copyright

We will add tube to finished tag

Open your AS

Open your snow of choice (I used 167-mng)

Edit/select all

Back in PSP - copy merged

Paste as new animation

Hold down CTRL and hit L for a total of 30 frames

CTRL and A to select all

Grab your first frame of snow and drag on to your first frame of image/release

View animation....if happy grab your tube and paste in AS

Hold down CTRL and hit L for a total of 30 frames

CTRL and A to select all

Grab your tube and position

Save


Wednesday, December 6, 2023

New Year Bling - FTU

Scrapkit - New Years Bling by Shelly - HERE

Template - #107 by Becky - HERE

Tube - Pinuptoons - HERE

***Disclaimer***

This tutorial is of my own creation. I am using PSP2019. Please leave a thanks when downloading.  If I am using a template, I always start at the bottom and work my way up. If using a FTU or PTU tube - please don't use without proper copyright. Always drop shadow as you go. If you try one of my tuts, I would love to display it on my blog....thanks

~~~~~~~~~~~~~~~~~~~~~~~~

Open template and delete copyright layer, 3 squares layer, and word art

Image/canvas size/800x800

Circle big - add noise of choice

Circle - p17

E124 - resize 90%

E91 - resize 80%

Rectangle bg - add noise of choice

Rectangle - p4

Square - p10

Snowflakes - delete their background

Frame - p14

E118

E92 - resize 80%

E122

E86 - resize 60%

E125 - resize 90%

E109 - resize 60%

Strip - p1

E58 - resize 35%

Swirl - p5

E114 - resize 70%

E123

E99

Position tube

E64 - resize 30%

Duplicate/mirror

E63 - resize 30%

E7 - resize 40%

E80 - resize 35%

E33 - resize 40%

You can animate if you want

Merge visible/crop/resize as needed/add proper copyright 

Sunday, September 3, 2023

Falling Leaves - FTU - Animated

 Scrapkit - DBS - Sunny Days - HERE

Mask - your choice

Template - EFR Exclusive by Natalie - HERE

Animation - Leaves from SBOF - HERE

Tube - PUT - HERE

***Disclaimer***

This tutorial is of my own creation. I am using PSP2019. Please leave a thanks when downloading.  If I am using a template, I always start at the bottom and work my way up. If using a FTU or PTU tube - please don't use without proper copyright. Always drop shadow as you go. If you try one of my tuts, I would love to display it on my blog....thanks

~~~~~~~~~~~~~~~~~~~~~~~~

Open template and delete copyright layer

Image/canvas size/800x800

(If animating - flood fill with white)

Frame2

P15 - apply mask/merge group

Raster8 - p5

E29

E101 - mirror

E105 - resize 95%

E100

E23 - erase stem and position

Merge9 & copy9 together - p1

Apply glass effect of choice

Merge 10&copy together 

Selections/all/float/modify/expand by 3/new raster layer/flood fill with color of choice/select none/move under original and add same glass effect

Raster6 - flood fill with same color and add noise of choice

Raster2 - p13

Raster4 - 15

E53 - resize 35%

E59 - resize 50%

Raster5 - flood fill same and glass same

Raster3 - p4

E92 - resize 35%

Move the word arts into position and add a small gradient glow

Position/duplicate/mirror/position

E83 - resize 30%

Image/free rotate/left by 20

E92 - resize 50%

E97 - resize 50%

Position tube

(If animating, merge all but tube)

Merge visible/crop/resize as needed/add proper copyright

TO ANIMATE:

PSP - copy image

AS - paste as new animation

Open leaves mng

Edit/select all

Image - ctrl+L 33 times for a total of 34 frame

ctrl+A (this selects all)

Click the animation tab at top - select resize animation


Grab first frame of animation and drag to first frame of image and position

Back in PSP - grab your tube

Paste as new animation

Image - ctrl+L 33 times for a total of 34 frame

ctrl+A (this selects all)

Grab frame1 of tube and drag to frame 1 of image and position/release

View/animation

Save
(You can also do the same step with names)


Sunday, April 9, 2023

Sparkle with Diamonds - FTU

Scrapkit - Diamond by MizT - HERE

Mask - by me - HERE

Template - 181 by Punky - HERE

Tube - Keith Garvey - HERE

***Disclaimer***

This tutorial is of my own creation. I am using PSP2019. Please leave a thanks when downloading.  If I am using a template, I always start at the bottom and work my way up. If using a FTU or PTU tube - please don't use without proper copyright. Always drop shadow as you go. If you try one of my tuts, I would love to display it on my blog....thanks

~~~~~~~~~~~~~~~~~~~~~~~~

Open template and delete copyright layer

Image/canvas size/800x800

P3 - apply mask/merge group/send to bottom

E36 - position left

Duplicate/mirror/flip

Film strip back - p11

Film strip - flood fill color of choice

Film strip frame - p9

E7 - resize 15%

Mura meister/copies/encircle/16,68,68

Circle - p1

Circle frame - flood fill

E9

E36

Lg star - p4

Add close up

I used layer properties at multiply with a 70  opacity

Lg star frame - flood fill

Left & right star - p5

Left & right frame - flood fill

E21 - resize 35%

E39

E26 - name animate

E33 - duplicate/mirror

E37

E28 - resize 60%

E11 - resize 20%

Position left/duplicate/mirror

E4

E29 - name animate

E13 - resize 35%

Place your tube where you like

If you aren't animating

Merge visible/crop/resize as needed/add proper copyright

Animation - add copyright and crop/resize as you like

Open AS

On your ani layers - use Alien Skin Xenofex2/constellation with these settings

2.16/6,8,1,100,55,twinkle rotation 45/keep original image

Copy merged

In AS paste as new animation

PSP - undo

Constellation - hit random 1 time and apply that setting to ani layers

Copy merged

In AS - paste after current frame

PSP - undo

Constellation - hit random 1 time and apply that setting to ani layers

Copy merged

In AS - paste after current frame

Click view tab/animation

If happy, save


Betsy E. made a 3 piece set!


Tuesday, January 17, 2023

Bling Burst - FTU

Tried my hand at a bling....if you use, please share with me....thanks!!


You can get the bling - HERE


This one you can get - HERE


Tuesday, November 29, 2022

Snow - PTU - Animated

Scrapkit - DBD Christmas Delights - HERE (on sale at this time)

Mask - your choice

Template - Creative Misfits - HERE (Freja)

Tube - Garvey - HERE (I got mine when he had his store)

Animation - Simone snow - HERE (heavenly snowfall)

***Disclaimer***

This tutorial is of my own creation. I am using PSP2019. Please leave a thanks when downloading.  If I am using a template, I always start at the bottom and work my way up. If using a FTU or PTU tube - please don't use without proper copyright. Always drop shadow as you go. If you try one of my tuts, I would love to display it on my blog....thanks

~~~~~~~~~~~~~~~~~~~~~~~~

Open template and delete copyright layer, dotted round circle on frame, and word snow

Image/canvas size/800x800

Flood fill background white

P20 - apply mask/merge group/send to bottom

Circle small - p3

Circle frame - flood fill color of choice

Add a glass effect

Rectangle's l&r - p12

Rectangle's frames white - flood fill dark color of choice

Add noise

Rectangle's frames - flood fill light color of choice

Add a glass effect

Sm snwflk white - p5

Sm snwflk frame - flood fill dark color

Big circle - p12

E37

Bg circle lt blue frame - flood fill dark color

Add noise

Bg circle dk blue frame - flood fill light color

Add a glass effect

Let it snow circle shadow - flood fill light color

Let it snow word art - flood fill dark color

Rectangle bkgrnd white - p9

Rectangle frames - do as the other frames

Medium snwflk bkgrnd - p13

Frames - do the same as the other frames

E24

Big snowflake - p5

Position tube

E101 - resize 60%

Frames - same as others

Medium snwflk - p13

Frames - same as others

Click top layer

E40 - resize 80%

E48 - resize 60%

E124

E2 - resize40%

E62 - resize 60%

E20 - resize 30%

E17 - resize 25%

Merge visible/crop/resize as needed/add proper copyright 

If animating:

Open AS

Open heavenly snowfall animation shop image

Select all

Copy your image into AS

Hit control+L till you have 23 frames

Control+A to select all

Drag your snow over onto your image

View animation, if happy, save

Sunday, October 23, 2022

Cute Witch - animated

 Scrapkit - MBM Witches Brew add on - HERE

Template - Rachey #135 - HERE

TextureHERE  (I used 7 and 8)

Plug ins - Transparency - HERE  (I used eliminate black)

***you will have to promote raster to background layer before using the filter to get rid of the black)***

EC5 - nature - smoke

Alien Skin -  xenofex - constellation

Tube - DiMary - HERE

***Disclaimer***

This tutorial is of my own creation. I am using PSP2019. Please leave a thanks when downloading.  If I am using a template, I always start at the bottom and work my way up. If using a FTU or PTU tube - please don't use without proper copyright. Always drop shadow as you go. If you try one of my tuts, I would love to display it on my blog....thanks

~~~~~~~~~~~~~~~~~~~~~~~~

Open template and delete copyright layer

BG - p11

Top & bottom wave - merge together - p3

Duplicate so you have 3 (if you want to animate and rename 1,2,3)

Merge squares together - p5

Add small gradient glow

Black circle - flower3

Frame5 - resize 70%

Position your tube

Textures - resize 40%

Position and merge together

Duplicate so you have 3 (rename 1,2,3)

Border - flood fill black

Add proper copyright

If not animating, save

ANIMATION

Open AS

Here are the settings for xenofex - constellation for your lines


Settings for smoke (basic tab)

Click  on layer 1 of wavy lines - apply constellation (x out)

Click layer 2 - constellation and hit random seed once (x out)

Click on layer 3 - constellation and hit random seed once
~~~~~~~~~~~~~~~~~~~~~~~~~~~~~~~~~~~~~~~~~
Smoke layers you will do the same with smoke effect
~~~~~~~~~~~~~~~~~~~~~~~~~~~~~~~~~~~~~~~~~`
Copy merged

AS - paste as new animation

PSP - x out those layers and open layer 2

Copy merged

AS - paste after current frame

PSP - x out those layers and open layer 3

Copy merged

AS - paste after current frame

AS - edit/select all

Click the Animation tab/frame properties to 20

View/animation....if happy save


Wednesday, June 22, 2022

Stars - FTU - animated


 Scrapkit - Tasha's "Beach Bash USA" - HERE

Template - Temp #2 - HERE

Mask - #2 from sylvie - HERE

Plug in - VM Natural - Sparkle - HERE

Tube - PUT - HERE

***Disclaimer***

This tutorial is of my own creation. I am using PSP2019. Please leave a thanks when downloading.  If I am using a template, I always start at the bottom and work my way up. If using a FTU or PTU tube - please don't use without proper copyright. Always drop shadow as you go. If you try one of my tuts, I would love to display it on my blog....thanks

~~~~~~~~~~~~~~~~~~~~~~~~

Open template and delete copyright layer and bottom 2 circles

Image/canvas size 800x800

Flood fill background white (for animation)

P2 - apply mask/merge group

Stars

Raster9 - p8

Sparkles1

Raster3 - p4

Raster6 & 7 - flood fill white

Raster2 - p2

Adjust/blur/gaussian at 20

Duplicate 2 x's (total of 3)

2nd duplicate apply your plug in

Effects - VM Natural - sparkle/max size - 13

Close that layer out, and on next duplicate, change the random seed

Close that layer out and on last layer - hit random again

Raster10 - flood fill your choice

Adjust/add noise at 100

Raster4 - p3

Fireworks1

Glove

Branch - resize 85%

Duplicate/mirror

Raster5 - flood fill white

Doodle - place left/duplicate/mirror

Bottlecap2

Hot air balloon

Stars2

Position tube

If you are not going to animate/crop/merge visible/resize/add proper copyright

ANIMATION

Crop your tag and resize as needed/add proper copyright

Open AS

Click image/copy merged

In AS - paste as new animation

In PSP - close out layer/open next layer/copy merged

In AS - paste after current frame

In PSP - close out this layer/open last layer/copy merged

In AS paste after current frame

View animation/if happy save

Lavada

Sandy

Rosey
KITT

Pamela


Saturday, April 30, 2022

Blush - FTU - Animated


Scrapkit - Blushing Beauty by Pammyyy - HERE

Template - SE 126 - HERE

Mask - your choice

Animation - Simone - HERE  ( I used the 2nd one)

Tube - Alicia Mujica - HERE

***Disclaimer***

This tutorial is of my own creation. I am using PSP2019. Please leave a thanks when downloading.  If I am using a template, I always start at the bottom and work my way up. If using a FTU or PTU tube - please don't use without proper copyright. Always drop shadow as you go. If you try one of my tuts, I would love to display it on my blog....thanks

~~~~~~~~~~~~~~~~~~~~~~~~

Open template and delete copyright layer, butterflies, and word art

Image/canvas size 800x800

P4 - apply mask/merge group

Bg mask - adjust/hue sat/colorize/235,200

Cluster1 - resize 90%

Bg frame - p7

Inner bevel

Frame fill - p8

Close-up

Xero - radiance at default

Layer properties - Luminance L/opacity at 70

Frame trim - add noise of choice

Frame - p7

Inner bevel

Position tube

E8 - resize 30%

duplicate/image/mirror - fill up the corners

E10

Duplicate/mirror/flip

E16

Cluster2 - resize 40%

E20 - resize 25%

Duplicate/mirror - position these as you want

Move the following elements around as you like

E5 - resize 15%

E7 - resize 30%

E9 - resize 25%

E4 - resize 25%

E12 - resize 30%

Duplicate/mirror and position

E17 - resize 30%

Merge visible/crop/resize as needed/add proper copyright

IF ANIMATING:

Open AS

Open your butterflies - select all

In AS - animation tab/resize animation by 90

PSP - copy image

Paste in AS as new animation

Ctrl+L - till you have 20 frames

CTRL+A to select all frames

Grab and drag you butterfly ani onto your image and place where you like

Click back on butterfly ani and hit undo

Animation tab/mirror

Grab and drag you butterfly ani onto your image and place where you like

View tab/animation

If happy, save

Lavada