Figured I would try my hand at a forum template....would love to see what you create and thanks

PSP is - HERE
PSD is - HERE


Scrap kit - Winter Time by Emma - HERE
Template - EFR - HERE (used the forum style)
Tube - Polkadoodles - HERE
***Disclaimer***
This tutorial is of my own creation. I am using PSP2019. Please leave a thanks when downloading. If I am using a template, I always start at the bottom and work my way up. If using a FTU or PTU tube - please don't use without proper copyright. Always drop shadow as you go. If you try one of my tuts, I would love to display it on my blog....thanks
~~~~~~~~~~~~~~~~~~~~~~~~
Open template and delete copyright layer and music notes
Raster3 - p3
Promoted selection - p1
E10
E39 - resize 40%
E25 - resize 30%
E59 - resize 35%
Raster2 - p7
Add glass effect of choice
E36 - resize 20%
Duplicate/mirror
E57 - resize 15%
E38 - resize 20%
Raster1 - p10
Add glass effect
Position your tube
Merge visible/crop/resize as needed/add proper copyright
Sandy


Tube of choice. I used 2 tubes by Alicia Mujica - HERE
Plug Ins - Mura Meister, Alien Skin Xenofex2, DSB Flux, and Xero
~~~~~~~~~~~~~~~~~~~~~~~~~~~~~~~~
New image/625x300
Paste image
Mura meister/copies/preset menu seamless
Adjust/sharpness/sharpen more
Adjust/blur/motion/angle 25/strength 100
Do blur again
Adjust/sharpness/sharpen more
Duplicate
DSB Flux - Bubbles/5,20,20,20
Layer properties to Screen or what looks best for you
Click on original layer
Grab your selection tool/rounded rectangle
Draw across your image
Convert to layer/select none
Bring to top
On this new layer/add a small border
Drag down one layer and rename animation
I added a small green drop shadow to this layer
Click top layer
Grab your other tube and position as you like
Merge these tube layers together
Xero/porcelain/all sliders to left
Adjust/sharpness/sharpen more
Layer properties screen with opacity at 60
Place main tube
Add new layer and flood fill with color of choice
Select all/modify/contract by 4 or 6/hit delete/select none
Add inner bevel of choice
Add proper copyright and save
If animating, continue
Click on your ani layer
Xenofex-constellation at 5,20,50,25,50,75,twinkle at 45/keep original image checked
Copy merged
In AS, paste as new animation
Back in PSP, undo
Constellation - hit random seed
Copy merged
In AS - click image and paste AFTER current frame
Back in PSP, undo
Constellation - hit random seed
Copy merged
In AS - click image and paste AFTER current frame
View animation, if happy, save
As always, would love to see what you create....thanks

Scrapkit - MBM Witches Brew add on - HERE
Template - Rachey #135 - HERE
Texture - HERE (I used 7 and 8)
Plug ins - Transparency - HERE (I used eliminate black)
***you will have to promote raster to background layer before using the filter to get rid of the black)***
EC5 - nature - smoke
Alien Skin - xenofex - constellation
Tube - DiMary - HERE
***Disclaimer***
This tutorial is of my own creation. I am using PSP2019. Please leave a thanks when downloading. If I am using a template, I always start at the bottom and work my way up. If using a FTU or PTU tube - please don't use without proper copyright. Always drop shadow as you go. If you try one of my tuts, I would love to display it on my blog....thanks
~~~~~~~~~~~~~~~~~~~~~~~~
Open template and delete copyright layer
BG - p11
Top & bottom wave - merge together - p3
Duplicate so you have 3 (if you want to animate and rename 1,2,3)
Merge squares together - p5
Add small gradient glow
Black circle - flower3
Frame5 - resize 70%
Position your tube
Textures - resize 40%
Position and merge together
Duplicate so you have 3 (rename 1,2,3)
Border - flood fill black
Add proper copyright
If not animating, save
ANIMATION
Open AS
Here are the settings for xenofex - constellation for your lines


Scrapkit - Unicorn Tales by Magik - HERE
Mask - 2nd one down - HERE
FTU Font - HERE
Tube - Polkadoodles - HERE
***Disclaimer***
This tutorial is of my own creation. I am using PSP2019. Please leave a thanks when downloading. If I am using a template, I always start at the bottom and work my way up. If using a FTU or PTU tube - please don't use without proper copyright. Always drop shadow as you go. If you try one of my tuts, I would love to display it on my blog....thanks
~~~~~~~~~~~~~~~~~~~~~~~~
Open new image 625x250
P5
P13 - apply mask/merge group
Grab your selection tool/rounded rectangle
Go across your canvas
Click your paper layer/promote selection
Adjust/sharpen more
E9 - resize 50%
E55
Bring selection to top
Grab your font - size at 90
Type out your word art - inner bevel of choice
E54
E58
E49 - resize 40%
Add tube
Merge visible
Add new raster layer and flood fill with color of choice
Selections/all/modify/contract by 5/delete/select none and add an inner bevel
Add proper copyright
Lavada


Open new canvas of 600x250
Flood fill with light color of choice
Paste tube
Mura meister/copies/line:


Scrapkit - Toadily Spring - HERE
Template - #45 by MizTee - HERE
Tube - CRM - HERE
***Disclaimer***
This tutorial is of my own creation. I am using PSP2019. Please leave a thanks when downloading. If I am using a template, I always start at the bottom and work my way up. If using a FTU or PTU tube - please don't use without proper copyright. Always drop shadow as you go. If you try one of my tuts, I would love to display it on my blog....thanks
~~~~~~~~~~~~~~~~~~~~~~~~
Open template and delete copyright layer
1 - p11
2,5,11 - flood fill color from tube
Add noise to your liking
3,7,10 - p2
E27 - image/free rotate/right by 90
4,8,12 - p5
6,9,13 - p1
Paste close-up - layer properties lighten
E47 - resize 50%
E15 - resize 30%
Duplicate/image/mirror
E1 - resize 60%
E2 - resize 40%
Position and merge down
Position tube
WA - resize 45%
I added a small border
Selections/all/float/modify/expand by 3/new raster layer and flood fill with color of choice/select none and move down below word
Merge visible/crop/resize as needed/add proper copyright
Lavada


Scrapkit - Butterfly Bouquet by TTD - HERE
Mask - HERE
Font - Little Bunny - HERE (used for wording)
Tube - Yuki - HERE
***Disclaimer***
This tutorial is of my own creation. I am using PSP2019. Please leave a thanks when downloading. If I am using a template, I always start at the bottom and work my way up. If using a FTU or PTU tube - please don't use without proper copyright. Always drop shadow as you go. If you try one of my tuts, I would love to display it on my blog....thanks
~~~~~~~~~~~~~~~~~~~~~~~~
Open image/600x250 and 200x200
Paste tube onto canvas
Mura meister/copies/wallpaper rotate
Adjust/blur/motion/angle 75/strength 100
Repeat 2 x
Effects/edge/enhance more
Duplicate
On duplicate layer - apply mask/merge group
Effects/3d/inner bevel
DS
Bottom layer/effects/texture/antique
Merge visible
Copy
Place in your avatar
Back to main image
Paste close up/layers/multiply
Grab your selection tool/rounded rectangle and draw across image
Promote selection to layer
Adjust/blur/gaussian/10
Gradient glow of choice
Copy to avatar
Main image
Grab little bunny font (or use mine at end of tut)/40/white
Type your saying/effects/3d/inner bevel
Resize main tube and position
Paste onto avatar
Main image
Merge visible
New raster layer
Flood fill with color of choice
Selections/modify/contract by 6/delete/select none
Adjust/add noise
New raster layer
Flood fill with dark color of choice
Selections/modify/contract by 4/delete/select none
Effects/3d/inner bevel
Do the same to avatar
Add proper copyright


Scrapkit - Winter Kisses - HERE
Mask - Spawn #15&10 - HERE (masks 31-40)
Tube - Alex Prihodko with VMA - HERE
***Disclaimer***
This tutorial is of my own creation. I am using PSP2019. Please leave a thanks when downloading. If I am using a template, I always start at the bottom and work my way up. If using a FTU or PTU tube - please don't use without proper copyright. Always drop shadow as you go. If you try one of my tuts, I would love to display it on my blog....thanks
~~~~~~~~~~~~~~~~~~~~~~~~~~~~~~~~~~~~~~~~~~~~~~~~~
Open new image/600x250
Flood fill with gradient of choice
Effects - EC4000 - hsb noise
Pp1b - apply mask 15/merge group
Pp3a - apply mask 10/merge group - rename this layer animate
E20 - duplicate/image/mirror
E23
E18
Move your animate layer to top
Position tube
New raster layer
Flood fill with same gradient
Selections all/float/modify/contract by 4/delete/select none
Add proper copyright
Click on animate layer
Effects/ASX/constellation :3,100,30,0,100,100 angle 45/keep original image
Copy merged
AS - paste as new animation
PSP hit undo
ASX/constellation/random seed
Copy merged
AS - paste after current frame
PSP hit undo
ASX/constellation/random seed
Copy merged
AS - paste after current fame
View animation - if happy...save
KITT

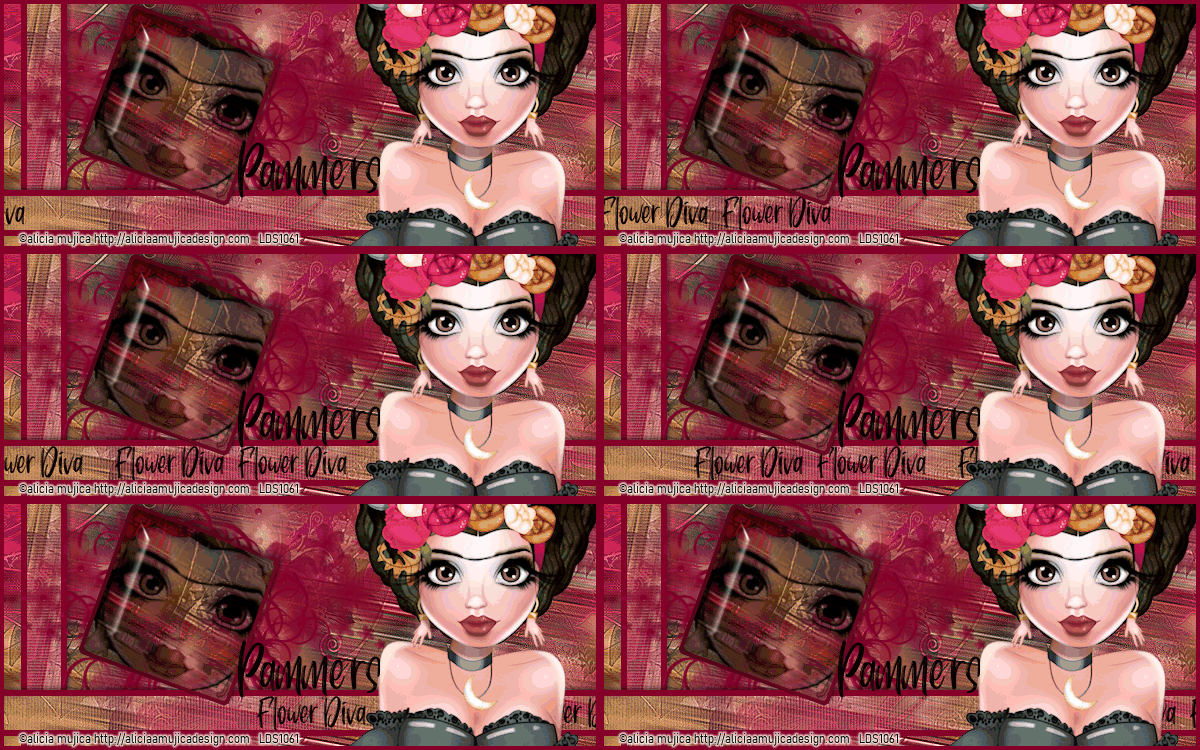
Tube - Alicia Mujica - HERE
Mask - MB&SW - HERE (4th one down)
PSP Effects
~~~~~~~~~~~~~~~~~~~~~~~~~~~~~~~~~~~~~~~
Open new image 600x250
Open mask in PSP
I selected the flowers on her head to use for wallpaper
Mura Meister/copies/wallpaper/default
Duplicate
Adjust/blur/motion blur/angle & strength 100
Repeat 2 more times
Effects/edge/enhance more
Resize mask by 80%
Layers/new mask layer/from image....in your drop down, find mask/source luminance checked/ok/merge group
Click on original copies layer
Adjust/blur/gaussian at 10
Click back on top layer
Merge visible
Grab your selection tool/rounded rectangle
Draw a thin rectangle across your canvas
Layers/promote selection to layer/modify/expand by 6/new raster layer/flood fill with dark color/drag below promoted selection/select none
Click on promoted layer
Effects/texture/blinds
Merge down -rename this animation
Duplicate/image/free rotate by 90 and position
Grab your selection tool/square
Draw a square anywhere on canvas
Layers/promote selection to layer/modify/expand by 6/new raster layer/flood fill with dark color/drag below promoted selection/keep selected
click promoted layer and add close up of tube/invert/delete/select none
Plug in - xero/porcelain/layer properties to multiply or what you think looks best
Merge these 3 layers together and position
Free rotate right by 20
Plug in - EC4000/glass
Position
Use a brush of choice to decorate
Position main tube
Crop
Add new layer
Flood fill with color of choice
Selections/all/modify/contract by 4/delete/select none
Add proper copyright
If you want to animate...continue, otherwise save your image
Click on your animation layer
Type out word or quote of choice
Copy merged
Open As
Paste as new animation
Back in psp....use your right arrow to move your text
Copy merged
In AS - paste after current frame
Back in psp....use your right arrow to move your text
Copy merged
In AS - paste after current frame
Continue doing these steps till your text goes all the way over
Check your animation
Edit/select all/view/animation/change your speed...I did mine to 20
Save
Would love to see your take
NancyR


Scrapkit - Fabulous 50's - HERE
Tube - PUT from CDO - HERE
~~~~~~~~~~~~~~~~~~~~~~~~~~~~~~~~~
Open new image 600x250
Remember to DS as you go
P7
Adjust/blur/motion/angle 45, strength 100
Repeat
Adjust/sharpen
Duplicate/mirror and change blend mode to luminance legacy
Retro circles - resize 65%
Image/free rotate/right/90
E2 - resize 30%
Daddy O WA - resize 25% and free rotate right by 15
Cool baby WA - resize 25% and free rotate left by 15
Jukebox - resize 30%
Glasses - resize 25%
Image/free rotate/left/15
Diner sign - resize 25%
Image/free rotate/right/15
Position tube
New raster layer
Flood fill with color of choice
Selections/modify/contract by 6/delete/select none
Add inner bevel of choice
Merge visible/crop/add proper copyright
Rachey


Tube - Alicia Mujica - HERE
Brushes of choice
~~~~~~~~~~~~~~~~~~
Open new image - 600x250
Paste tube
Mura meister - with following:


