I made this cluster with the beautiful kit by Angel Wings Scraps, which you can find - HERE
Just click and save


I made this cluster with the beautiful kit by Angel Wings Scraps, which you can find - HERE
Just click and save

Scrapkit - Blushing Beauty by Pammyyy - HERE
Template - SE 126 - HERE
Mask - your choice
Animation - Simone - HERE ( I used the 2nd one)
Tube - Alicia Mujica - HERE
***Disclaimer***
This tutorial is of my own creation. I am using PSP2019. Please leave a thanks when downloading. If I am using a template, I always start at the bottom and work my way up. If using a FTU or PTU tube - please don't use without proper copyright. Always drop shadow as you go. If you try one of my tuts, I would love to display it on my blog....thanks
~~~~~~~~~~~~~~~~~~~~~~~~
Open template and delete copyright layer, butterflies, and word art
Image/canvas size 800x800
P4 - apply mask/merge group
Bg mask - adjust/hue sat/colorize/235,200
Cluster1 - resize 90%
Bg frame - p7
Inner bevel
Frame fill - p8
Close-up
Xero - radiance at default
Layer properties - Luminance L/opacity at 70
Frame trim - add noise of choice
Frame - p7
Inner bevel
Position tube
E8 - resize 30%
duplicate/image/mirror - fill up the corners
E10
Duplicate/mirror/flip
E16
Cluster2 - resize 40%
E20 - resize 25%
Duplicate/mirror - position these as you want
Move the following elements around as you like
E5 - resize 15%
E7 - resize 30%
E9 - resize 25%
E4 - resize 25%
E12 - resize 30%
Duplicate/mirror and position
E17 - resize 30%
Merge visible/crop/resize as needed/add proper copyright
IF ANIMATING:
Open AS
Open your butterflies - select all
In AS - animation tab/resize animation by 90
PSP - copy image
Paste in AS as new animation
Ctrl+L - till you have 20 frames
CTRL+A to select all frames
Grab and drag you butterfly ani onto your image and place where you like
Click back on butterfly ani and hit undo
Animation tab/mirror
Grab and drag you butterfly ani onto your image and place where you like
View tab/animation
If happy, save
Lavada


Scrapkit - Photographs by AWS - HERE
Mask - Andi from EFR - HERE (9th one down)
Tube - Amber with VMA - HERE
Word Art by Me - HERE
***Disclaimer***
This tutorial is of my own creation. I am using PSP2019. Please leave a thanks when downloading. If I am using a template, I always start at the bottom and work my way up. If using a FTU or PTU tube - please don't use without proper copyright. Always drop shadow as you go. If you try one of my tuts, I would love to display it on my blog....thanks
~~~~~~~~~~~~~~~~~~~~~~~~
Open p19 - apply mask/merge group
Flower bunch - resize 35%
Mura meister/copies/encircle/10,60,60
Flower2 - resize 20%
Mura meister/copies/encircle/10,70,70
Leaves2 - resize 20
Mura meister/copies/encircle/10,75,75
Position your tube
Heart4 - resize 80%
Word art/adjust/hue-sat/your liking
Resize 60%
Decorate heart to your liking
Open flower bunch - resize 20%
Image/canvas size 800x800
Mura meister/copies/line rotate/4,50
Position on image
Flower pot - resize 35%
Flower7 - resize 35%
Duplicate/image/mirror
Leaves3 - resize 45% and position in different areas
Merge visible/crop/resize as needed/add proper copyright

Scrapkit - AWS - Photographs - HERE
Mask - your choice
Tube - 3 tubes - I used PUT's from HERE
***Disclaimer***
This tutorial is of my own creation. I am using PSP2019. Please leave a thanks when downloading. If I am using a template, I always start at the bottom and work my way up. If using a FTU or PTU tube - please don't use without proper copyright. Always drop shadow as you go. If you try one of my tuts, I would love to display it on my blog....thanks
~~~~~~~~~~~~~~~~~~~~~~~~
P16 - apply mask/merge group
Ribbon4 - resize 80%
WA1 - resize 90%
Star2
Star3 - mirror
Flower7 - resize 30%
Mura meister/copies/encircle/15,75,75
We are going to make 3 images
Grab 3 frames of choice
Position a different tube in each frame
Add a paper of choice
Click inside each frame/selections/modify/expand by 3/invert/delete tube and paper layer
Now crop all 3 frames and merge each one
Tube layers - layer properties to luminance legacy (or what works best)
Resize each frame 45%
Position each frame as you see fit/image/free rotate of your choice
Sparkles4
Camera3 - resize 30%
WA5 - resize 80%
Sparkle3
Merge visible/crop/resize as needed/add proper copyright

Scrapkit - Lilac Melody by TTD - HERE
Template - Chantal - HERE (last one...click on the image to download)
Mask - by Sandra - HERE (fancy floral frame) and mask of choice
Tube - Alex Prihodko - HERE
***Disclaimer***
This tutorial is of my own creation. I am using PSP2019. Please leave a thanks when downloading. If I am using a template, I always start at the bottom and work my way up. If using a FTU or PTU tube - please don't use without proper copyright. Always drop shadow as you go. If you try one of my tuts, I would love to display it on my blog....thanks
~~~~~~~~~~~~~~~~~~~~~~~~
Open template and delete copyright layer
Image/canvas size 800x800
P14 - apply mask of choice/merge group
Open p8 - apply mask/merge group/resize 70%
Add an inner bevel
E79
Layer1 - p11
E34
Layer3 - p2
Layer5 - p1
E5 - resize 60%
Click top layer
E97 - resize 80%
E121 - resize 80%
E74
E33
E72
E78
E51 - resize 60%
E26 - resize 30%
Duplicate/image/mirror
E75
E93 - resize 35%
E58
Position tube
Merge visible/crop/resize as needed/add proper copyright
Rachey


Scrapkit - Florality by ChiChi - HERE
Template - Creative Misfits - HERE (May folder/Basima/template1)
Mask - your choice
Tube - The Paper Shelter - HERE
***Disclaimer***
This tutorial is of my own creation. I am using PSP2019. Please leave a thanks when downloading. If I am using a template, I always start at the bottom and work my way up. If using a FTU or PTU tube - please don't use without proper copyright. Always drop shadow as you go. If you try one of my tuts, I would love to display it on my blog....thanks
~~~~~~~~~~~~~~~~~~~~~~~~
Open template and delete copyright layer, word art, and hearts
Image/canvas size/800x800
P2 - apply mask/merge group
Raster2 & copy - merge together - p13
Add an inner bevel and delete original
Raster4 - p12
Delete original
Flower frame
Flower3 - resize 35%
Mura meister/copies/encircle/default
Frame1 - resize 70%
Leaves1
Leaves - resize 50%
Flower trail - mirror
Flowers - resize 70%
Flower - resize 40%
Jar - resize 45%
Flower brush
Flower brush1
Rabbit trail
Bird - resize 25%
Lamp - resize 40%
Add tube of choice
Merge visible/crop/resize as needed/add proper copyright
Barb


Playing around and came up with these flower masks...as always, would love to see what you create...thanks and enjoy...just click and save


Scrapkit - For You by Chaos Preistess FB fan group - HERE
Mask - your choice
Tube - Arthur Crowe - his store is closed
***Disclaimer***
This tutorial is of my own creation. I am using PSP2019. Please leave a thanks when downloading. If I am using a template, I always start at the bottom and work my way up. If using a FTU or PTU tube - please don't use without proper copyright. Always drop shadow as you go. If you try one of my tuts, I would love to display it on my blog....thanks
~~~~~~~~~~~~~~~~~~~~~~~~
P4
Frame2
Grab magic wand and click inside each square
Click on your paper layer/promote selection to layer/select none
Drag below the frame
Closeup
Layer properties/darken/opacity at 50
Click back on your paper/apply mask/merge group
E14
Click top layer
E9
E15 - resize 50%
Duplicate/mirror
E1
E21
E8 - resize 55%
E2 - resize 60%
Free rotate/right by 30
Place tube
Merge visible/crop/resize as needed/add proper copyright
Maurine (Chaos Priestess)


Scrapkit - Delicate Noon by TTD - HERE
Template - #219 by HPD - HERE
Mask - your choice
Tube - HERE
***Disclaimer***
This tutorial is of my own creation. I am using PSP2019. Please leave a thanks when downloading. If I am using a template, I always start at the bottom and work my way up. If using a FTU or PTU tube - please don't use without proper copyright. Always drop shadow as you go. If you try one of my tuts, I would love to display it on my blog....thanks
~~~~~~~~~~~~~~~~~~~~~~~~
Open template and delete copyright layer
Image/canvas size 800x800
Layers 1-4 - merge together and flood fill color of choice
Layer5&7 - p12
Layer6&8- p15
P6 - apply mask/merge group and resize by 90%
Layer9 - p23
E91
Duplicate/image/mirror
E110
E118
Layer 10,11,&13 - p28
(I added a small border to these layers)
Apply close up
Effects - Xero/porcelain/default
Layer properties to hard light/opacity at 70
Adjust/Hue/sat at 0 & 0
Texture - weave of choice
Layers12&14 - flood fill same color
E26 - bottom
E113 - right
Position your tube
E38 - resize 60%
Duplicate/mirror
E56 - resize 40%
E120 - rotate left by 90
Duplicate/mirror
E63 - resize 30%
E46 - resize 30%
Duplicate/mirror
E88 - resize 40%
E92 - resize 50%
E42
E50 - resize 25%
E101 - resize 30%
Merge visible/crop/resize as needed/add proper copyright
NancyR


Scrapkit - For the Love of my Cat by MBM - HERE
Mask - your choice
Tube - PFD - HERE
***Disclaimer***
This tutorial is of my own creation. I am using PSP2019. Please leave a thanks when downloading. If I am using a template, I always start at the bottom and work my way up. If using a FTU or PTU tube - please don't use without proper copyright. Always drop shadow as you go. If you try one of my tuts, I would love to display it on my blog....thanks
~~~~~~~~~~~~~~~~~~~~~~~~
Open p12 - apply mask/merge group
E56 - resize 40%
Mura meister/copies/encircle/9,55,55
E3 - resize 90%
Grab your magic want and click inside each frame
Selections/modify by 3/p of choice/invert/delete
Move below frame layer
Decorate theses frames as you see fit
I added an inner bevel to my frames
E58 - position behind frame/duplicate/mirror
E60 - resize 40%
E9 - position/duplicate/mirror
E34 - resize 60%
E19 - resize 60%
E17 - resize 70%
E50 - resize 40%
E8 - position top/duplicate/flip vertical
Position tube
Merge visible/crop/resize as needed/add proper copyright
Rachey


Scrapkit - Cupcakes and Coffee by Pammyyy - HERE
Template - by Allison - HERE (not using avatar)
Mask - your choice
Tube - VMT - HERE
***Disclaimer***
This tutorial is of my own creation. I am using PSP2019. Please leave a thanks when downloading. If I am using a template, I always start at the bottom and work my way up. If using a FTU or PTU tube - please don't use without proper copyright. Always drop shadow as you go. If you try one of my tuts, I would love to display it on my blog....thanks
~~~~~~~~~~~~~~~~~~~~~~~~
Open template and delete copyright layer, top 3 layers, pixel text, 2 squares, and line
Image/canvas size 800x800
P7 - apply mask/merge group
E39 - resize 20%
Mura meister/copies/star cluster/20,50,75
I positioned mine left/duplicate/mirror
Merge these together
Image/flip and position as you like
Rectangles 1&3 - p4
Apply an inner bevel of choice
Rectangle2 - p6
Add a small white border
Add noise to the border
Upper & lower left rectangle - p3
Small circles - E42 - resize 30%
Large oval - E36 - resize 72%
Position tube
E47 - resize 30%
E46 - resize 40%
Duplicate/mirror
E48 - resize 60%
E14,
E50 - resize 60%
Duplicate/mirror
E3,4,10,14,32 - resize 20%
E15,40 - resize 35%
Merge visible/crop/resize as needed/add proper copyright

Scrapkit - May Blossoms - HERE
Cluster - by Edith - HERE
Mask - your choice
Tube - Misticheskaya - HERE
***Disclaimer***
This tutorial is of my own creation. I am using PSP2019. Please leave a thanks when downloading. If I am using a template, I always start at the bottom and work my way up. If using a FTU or PTU tube - please don't use without proper copyright. Always drop shadow as you go. If you try one of my tuts, I would love to display it on my blog....thanks
~~~~~~~~~~~~~~~~~~~~~~~~
Open cluster
Resize 75%
Canvas size 800x800
P11 - arrange/send to bottom
Magic wand - click inside frame/modify/expand by 8
Click on paper - promote selection to layer
Deselect
Apply mask of choice/merge group
E32 - image/free rotate/right by 30
Duplicate/image/mirror
Click top layer
E35 - resize 50%
E6 - resize 50%
Image/free rotate/left by 90
Duplicate/image/mirror
Position your tube
E14
E3 - resize 45%
E1
E8 - resize 70%
Merge visible/crop/resize as needed/add proper copyright
Lavada

Was playing around and came up with this word art for Cinco de Mayo....the word art is .mng and is animated. HERE (The cactus is not part of the word art) If you use this word art, would be great to see how....thanks


Scrapkit - Spring Surprises - DBD - HERE
Template - Tonya - HERE
Mask - your choice
Tube - Verymany - HERE
***Disclaimer***
This tutorial is of my own creation. I am using PSP2019. Please leave a thanks when downloading. If I am using a template, I always start at the bottom and work my way up. If using a FTU or PTU tube - please don't use without proper copyright. Always drop shadow as you go. If you try one of my tuts, I would love to display it on my blog....thanks
~~~~~~~~~~~~~~~~~~~~~~~~
Open template and delete copyright layer, top 5 layers, and pink text
Image/canvas size 800x800
P13 - apply mask/merge group
Back rect - p22
Rect background - flood fill color of choice
Add noise of choice
Rectangle - p21
Oval - p20
Thinner rect - p20
Rect 1 & 2 - merge together - p12
Circle background - do same as for rect background
Big circle - p1
E102 - resize 30%
Mura meister/copies/encircle/10,60,60
Tone layer - p20
Small circle - do same as before
E105 - resize 35%
Mura meister/copies/encircle/10,55,55
Small circle - p18
Position your tube
E64
E101 - resize 65%
E86 - resize 70%
E92 - resize 60%
E21 - resize 60%
E99 - resize 60%
E105 - resize 65%
E4 - resize 70%
E141
E138 - resize 35%
Merge visible/crop/resize as needed/add proper copyright
Thought this was a cute saying....hope you can use it and as usual...would love to see what you create!!!

So, April is Autism Awareness month...one of my twins is Autistic.....so here is a frame I made to share with you
The kit is "Being Different is Wonderful" from PFD - HERE
You can click on cluster and right click and save
Would love to see what you create with this cluster....thanks


Scrapkit - Summer Days - HERE
Template - by me at EFR - HERE
Tube - Polkadoodles - HERE
***Disclaimer***
This tutorial is of my own creation. I am using PSP2019. Please leave a thanks when downloading. If I am using a template, I always start at the bottom and work my way up. If using a FTU or PTU tube - please don't use without proper copyright. Always drop shadow as you go. If you try one of my tuts, I would love to display it on my blog....thanks
~~~~~~~~~~~~~~~~~~~~~~~~
Open template and delete copyright layer
Splatter and frame - p1
Click splatter - frames
Add inner bevel to frame
E128 - position top left
Duplicate/image mirror/image flip
Squares left and right - p8
E1 - resize 60% and position
E7 - resize 60%
E5 - resize 40%
Duplicate/image/mirror
Small circles - p4
E121
E68
E4 - resize 60%
E23 - resize 55%
E136 - resize 40%
E2 - resize 35%
E24 - erase stems - resize 75%
E61 - resize 30%
Position your tube of choice
Merge visible/crop/resize as needed/add proper copyright
Here are another 2 masks I found in my files....enjoy and hope to see what you create!! Thanks
As usual, click on mask and save


Scrapkit - Easter by Shaz - HERE
Template - #111 by Becky - HERE
Mask - your choice
Tube - The Hunter - not sure where he sells anymore, sorry
***Disclaimer***
This tutorial is of my own creation. I am using PSP2019. Please leave a thanks when downloading. If I am using a template, I always start at the bottom and work my way up. If using a FTU or PTU tube - please don't use without proper copyright. Always drop shadow as you go. If you try one of my tuts, I would love to display it on my blog....thanks
~~~~~~~~~~~~~~~~~~~~~~~~
Open template and delete copyright layer and word art
Image/canvas size 800x800
P4 - apply mask/merge group
E0 - resize 35%
Mura meister/copies/encircle/12,70,70
Frame2 fill - p8
Add a close up
Layer properties/multiply/opacity at 40
Frame2 - add noise
Frame1 fill - p9
Add a close up
Layer properties/multiply/opacity at 40
Frame1 - add noise
E26
E9- resize 35%
Mura meister/copies/encircle/12,60,60
E41 - position bottom middle
E12 - bottom right
E7 - top left
E42 - position top right
Place tube
Merge visible/crop/resize as needed/add proper copyright


Scrapkit - Rock My World - HERE
Template - Salsa - HERE
Tube - Elias - HERE
***Disclaimer***
This tutorial is of my own creation. I am using PSP2019. Please leave a thanks when downloading. If I am using a template, I always start at the bottom and work my way up. If using a FTU or PTU tube - please don't use without proper copyright. Always drop shadow as you go. If you try one of my tuts, I would love to display it on my blog....thanks
~~~~~~~~~~~~~~~~~~~~~~~~
Open template and delete copyright layer and musical notes
Black rectangles - merge together - p17
circle and square - merge together - p12
Black rectangle - p10
Gradient2 - p9
Gradient - p15
Add p15 to avatar
Blue circles - merge together - p16
Gradient circle - p11
Notes
Add also to avatar
Frame1
Bead scatter
heart doodle
Skull doodle
Bow1 - resize 30%
Doodle - resize 80%
Bow5 - resize 60%
Position your tube
Gradient rectangle - p3
Black rectangle - p1
Music note scatter - resize 60%
Glitter trail
Deco
Music cross - resize 50%
Image/free rotate/right/20
Duplicate/image/mirror
Sparkles
Place on avatar
Word art - you decide how you want to do it
Merge visible/crop/resize as needed/add proper copyright

Scrapkit - Springtime Promise - HERE
Template - Tamie HERE (#2 - CMBT-EAS zip)
Mask - HERE #273
Tube - Colourbelle - CDO HERE
***Disclaimer***
This tutorial is of my own creation. I am using PSP2019. Please leave a thanks when downloading. If I am using a template, I always start at the bottom and work my way up. If using a FTU or PTU tube - please don't use without proper copyright. Always drop shadow as you go. If you try one of my tuts, I would love to display it on my blog....thanks
~~~~~~~~~~~~~~~~~~~~~~~~
Open template, delete copyright layer, big circle, and the top small circles
E44
Mura meister/copies/wallpaper
Apply mask/merge group
Rounded squares merge together - p2
Small circle - p4
Small circle2 - p4
Rounded rectangle - p6
E61
Hexagons merge together - p7
E32 - duplicate/image/flip
Position these as you like
Rounded rectangle 2&3 - p5
Rounded square - p3
Close up
E86 - erase stem Duplicate/image/mirror
E69 - mirror
E85 - resize 60%/mirror
E83 - resize 70%
E93 - resize 60%
E51 - resize 60%
E41
E27
E29
E47 - resize 60%
Do the word art to your liking
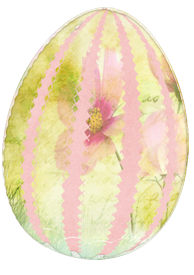
I added an egg I made in MBM forum...it is supplied at the end of tut
Merge visible/crop/resize as needed/add proper copyright


Scrapkit - Easter - HERE
Template - Tonya's (RIP) - HERE
Mask - mask frame - HERE
Tube - PFD - HERE
***Disclaimer***
This tutorial is of my own creation. I am using PSP2019. Please leave a thanks when downloading. If I am using a template, I always start at the bottom and work my way up. If using a FTU or PTU tube - please don't use without proper copyright. Always drop shadow as you go. If you try one of my tuts, I would love to display it on my blog....thanks
~~~~~~~~~~~~~~~~~~~~~~~~
Open template and delete copyright layer
Image/canvas size/800x800
Click bottom
P11 - apply mask/merge group
Background oval - p1
Background rectangle - p5
Rectangle background - add noise
Rectangle - p10
Weirdass shape - p9
Add inner bevel
Oval background - add noise
Oval - p2
E88 - resize 40%
E20 - resize 15%
Mura meister/copies/encircle/16,45,60
E29 - resized 75% (I erased the stem)
Duplicate/image/mirror
E30
E126
E13 - resize 45%
E14 - erase stem and resize 70%
E75
E41 - resize 75%
E95 - resize 50%
Position your tube
Merge visible/crop/resize as needed/add proper copyright
Rachey


